- Check the DNS and reverse pointers are operational.
Add a host record for the vCenter appliance.
Add a reverse pointer record for the vCenter appliance.
Perform a NSLOOKUP command to check DNS name resolution of the vCenter server.
NSLOOKUP <name of vCenter server>
- From a deployment workstation, install the Client Integration Plug-in and launch vcsa-setup.html to deploy the vCenter appliance to a ESXi host.
From VMWare, download the ISO named VMware-VCSA-all-6.0.0-3343019.iso and mount it on your deployment workstation using free tool such as WinCDEMU.
ESXi 6 and vCenter download here.
ESXi 6 and vCenter download here.
Navigate to the folder containing the Client Integration Plug-in and install the plug-in.
Navigate to the folder containing the vcsa-setup.html and launch it to initiate the vCenter server install.
Specify the ESXi host to deploy the vCenter appliance.
For security, compare the thumbprint with the selected ESXi host. Once comfirmed, click YES
Specify the vCenter server appliance to be deployed
Platform service controller can be install as embedded for smaller deployments or as a external controller for larger deployments.
Create a new SSO domain.
Note: SSO Domain name must be different than your Windows AD domain.
Specify the appliance size.
Note: Ensure that the ESXi host that will be running the vCSA meets the system requirements. For example, Tiny requires 2vCPU and 8G of RAM on the ESXi host.
Specify the destination datastore for the vCSA and enable Thin Disk Mode to save storage space.
Specify the database type. Embedded requires no configuration. Available Oracle database is required for latter option.
Specify the network settings for the vCSA.
Synchronize the time to ensure SSO, certificate and logging works.
Enable SSH.
Summary of the installation.
Downloading and deploying vCSA.
Once complete, log onto the vSphere Web Client via the URL https://your_vCSA_name/vsphere-client as administrator@vsphere.local
vCSA SSO sign-on.
Done!
If above method results in vCSA not working , try importing or deploying the vCSA via the OVA template.

Copy and rename the vmware-vcsa to vmware-vcsa.ova
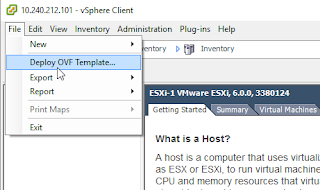
Connect to the ESXi host via Windows or Web vSphere client.
Specify the vCSA OVA file.
Note: Ensure that you do not power on after deployment!
Browse to the host's datastore to access the vmx file of the vCSA VM and download to modify.
Add the following entries to the vCSA VMX file:
guestinfo.cis.appliance.net.addr.family = "ipv4"
guestinfo.cis.appliance.net.mode = "static"
guestinfo.cis.appliance.net.addr = "IP address of vCSA server"
guestinfo.cis.appliance.net.prefix = "23"
guestinfo.cis.appliance.net.gateway = "IP address of your gateway"
guestinfo.cis.appliance.net.dns.servers = "IP address of your AD DNS server"
guestinfo.cis.vmdir.password = "password of adminstrator@vsphere.local"
guestinfo.cis.appliance.root.passwd = "password of adminstrator@vsphere.local"
Once vCSA VMX file has been updated, upload it to the datastore.
Power on the vCSA VM
Verify the network settings. vCSA should work now.


Thank you so much for sharing VCSA Appliance, it was so difficult to find and no one was sharing excitable ISO image. thank you once again.
ReplyDelete